
Get AI agents running on your WordPress site in under 5 minutes. No configuration overload — just three steps.
Step 1 — Install the plugin
In your WordPress dashboard go to Plugins → Add New and search for Agent Builder. Install and activate it. A new Agent Builder menu item will appear in your sidebar.
Prefer a manual install? Download the plugin from our download page, then go to Plugins → Add New → Upload Plugin.
Step 2 — Connect an AI provider
After activation, the Setup Wizard launches automatically. It walks you through choosing your prefered AI Provider, getting an API key, and testing the connection — with screenshots and recommendations for each model.
Already have an API key? The setup wizard helps with setup steps. You can also skip the wizard entirely and configure everything manually in Agent Builder → Settings.
No API key yet? See Connecting an AI Provider for a detailed guide to each supported provider, or let the Setup Wizard walk you through it step by step.
Step 3 — Start a conversation
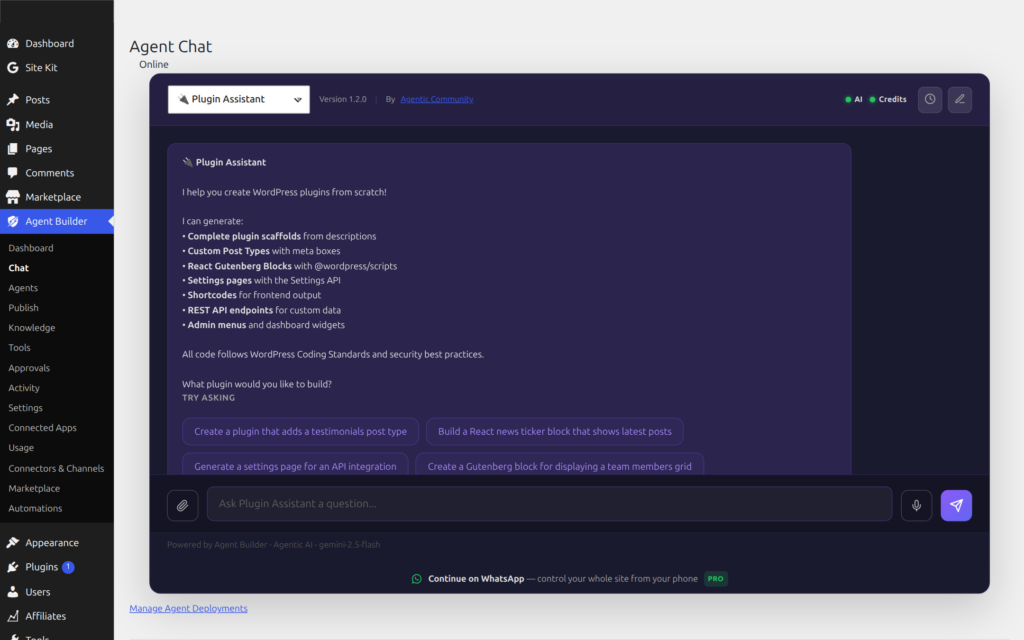
Go to Agent Builder → Installed Agents and click on any of the free bundled assistants — for example Content Writer. Type a message:
“Write a 300-word intro for a blog post about AI in small business.”
Hit send. Your assistant responds immediately in the chat panel.
That is all
From here explore what is possible:
- Explore bundled agents — the free plugin ships eight: Content Writer, WordPress Assistant, SEO Optimizer, Site Health Sentinel, Support Triage, User Assistant, Editorial Director, and Assistant Trainer. Agent Builder Pro adds nine specialists including SEO Assistant, Security Assistant, Site Doctor, and AI Radar.
- Browse the marketplace for premium agents by 3rd-party developers and WordPress community.
- Upgrade your license to unlock automatic updates, white-labelling, and marketplace offerings.
- Schedule tasks — run agents automatically on a cron schedule.
Need more detail on any step? Continue reading Getting Started for the full walkthrough.
Frequently Asked Questions
How long does the initial setup take?
Most users are running their first conversation within 5 minutes. Installing the plugin takes under a minute from the WordPress plugin directory. Getting an API key from xAI or OpenAI takes 2–3 minutes if you already have an account. The Setup Wizard walks you through every step with screenshots — you do not need to navigate any external dashboards yourself. If you choose Ollama for local AI, setup takes longer (15–30 minutes) because you need to install the Ollama application and download a model first.
Which AI provider should I start with?
Start with xAI (Grok) — new accounts receive $25 in free credits, which is enough for hundreds of conversations. It is fast, capable, and the free credit removes any billing concern while you get familiar with the plugin. If you already have an OpenAI account, GPT-4o Mini is an excellent starting model — very capable and inexpensive. For the most powerful results on complex tasks (large-scale content rewriting, multi-step SEO audits), Claude 3.5 Sonnet from Anthropic is the top performer. See Connecting an AI Provider for a full comparison.
Do I need a paid license to get started?
No. The free tier is fully functional with no time limit. You get all 8 bundled assistants, unlimited custom agents you build yourself, scheduled tasks, event automation, and the full permissions system — all without a license key. The only things behind a paid license are: marketplace assistant downloads, white-label branding removal, and the 3-site or 25-site activation limits for Personal and Agency plans. You can run Agent Builder on an unlimited number of sites for free. See Licensing and Pricing for the full breakdown.
What is the difference between Quick Start and Getting Started?
This Quick Start page is the fastest possible path to your first conversation — three steps, no extras. The Getting Started guide covers the same ground in more depth: it explains requirements in detail, covers manual installation via FTP, walks through the Setup Wizard screen by screen, explains how to activate a license key, and covers what each bundled assistant does. If you are comfortable following the three-step summary above, you do not need to read the longer guide. If you hit a snag or want more context on any step, Getting Started has the answers.
Can I install Agent Builder on a local WordPress site?
Yes. Agent Builder works on any WordPress installation — Local by Flywheel, MAMP, XAMPP, DevKinsta, or a Docker container. The only requirement is that your local PHP can make outbound HTTP requests to your AI provider’s API. If your local environment has firewall restrictions or no internet access, use Ollama to run a local AI model that does not require any external connection. Scheduled tasks on local sites require a real system cron job or a browser tab to trigger WP-Cron, since local sites do not receive real traffic.