Before You Install
Make sure your site meets these requirements:
- WordPress 6.4+ — Update WordPress first if needed. Check your version in Dashboard → Updates.
- PHP 8.1+ — Most hosts offer PHP 8.1 or 8.2 by default. Verify in Tools → Site Health → Info → Server → PHP version.
- Active internet connection from your server — Agent Builder makes outbound API calls to AI providers. Servers with outbound firewall restrictions may need rules added for openai.com, anthropic.com, and generativelanguage.googleapis.com.
- HTTPS — Agent Builder’s chat interface and API calls require a secure connection. Install an SSL certificate if your site is still on HTTP.
Install from WordPress Admin
- Log in to your WordPress admin dashboard
- Navigate to Plugins → Add New
- Type “Agent Builder” in the search box
- Find the plugin by Agentic and click Install Now
- After installation completes, click Activate
Install from ZIP File
If you downloaded Agent Builder as a ZIP file (from this site or your account dashboard):
- Go to Plugins → Add New → Upload Plugin
- Click Choose File and select your ZIP file
- Click Install Now
- Click Activate Plugin
Manual Installation via FTP
If your WordPress admin cannot upload files (common on managed hosts with restrictive upload limits):
- Unzip the agent-builder.zip file on your local machine
- Connect to your server via FTP or SFTP (use FileZilla or your host’s file manager)
- Upload the
agent-builderfolder to/wp-content/plugins/ - In your WordPress admin, go to Plugins → Installed Plugins
- Find Agent Builder in the list and click Activate
After Installation
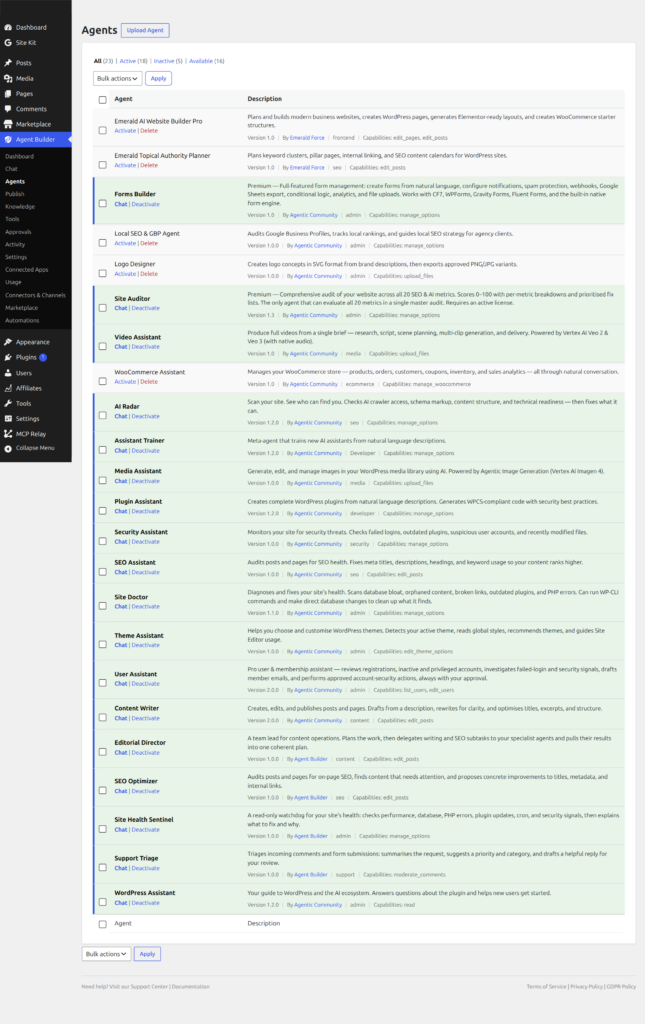
Once activated, the Setup Wizard launches automatically to guide you through connecting an AI provider. The wizard takes about two minutes. If you prefer manual configuration, skip the wizard and go to Agent Builder → Settings → AI Providers to connect an AI provider directly.
You can re-run the Setup Wizard at any time from Agent Builder → Dashboard.
WordPress Multisite
Agent Builder supports WordPress multisite networks. You can network-activate the plugin (making it available to all sites from the network admin) or activate it on individual sites. Each site in the network maintains its own AI provider configuration, agents, and conversation history. A single Agency licence covers all sites in a multisite network.
Updating
With a Personal or Agency licence, Agent Builder updates automatically through the WordPress updates mechanism — you will see it alongside theme and plugin updates in Dashboard → Updates. Free users can update by searching for the plugin in Plugins → Add New and clicking Update, or by reinstalling from the WordPress plugin directory.
Before updating on a production site, check the Release Notes for breaking changes. Major version updates (e.g., 2.x → 3.x) may require database migration steps described in the release notes.
Troubleshooting Installation
Plugin fails to activate with a white screen: This usually means a PHP version conflict. Confirm your server is running PHP 8.1+. Temporarily enable WP_DEBUG in wp-config.php to see the specific error.
Upload blocked by file size limit: If the ZIP upload fails, increase upload_max_filesize and post_max_size in your PHP configuration, or use the FTP installation method above.
Agent Builder menu not appearing after activation: Clear any WordPress object cache (if you use Redis or Memcached) and reload the page. If the menu still does not appear, deactivate all other plugins temporarily to check for conflicts, then reactivate them one by one.
Setup Wizard does not launch after activation: Navigate directly to Agent Builder → Dashboard and click the Setup Wizard button. If the dashboard is blank, check your browser console for JavaScript errors — a content security policy or JavaScript conflict with another plugin is the most common cause.
Frequently Asked Questions
Does Agent Builder work with managed WordPress hosts like WP Engine or Kinsta?
Yes. Agent Builder is compatible with all major managed WordPress hosts including WP Engine, Kinsta, Flywheel, Cloudways, and SiteGround. Some managed hosts restrict outbound HTTP requests — if the plugin cannot connect to your AI provider, ask your host to whitelist the provider’s API domain (e.g., api.openai.com).
Can I install Agent Builder alongside other AI plugins?
Yes. Agent Builder does not conflict with other AI plugins such as AI Engine or Bertha AI. If you have another plugin that also adds a chat widget to the front end, configure each plugin to display on different pages to avoid two chat widgets appearing simultaneously. Agent Builder’s widget placement is controlled in Agent Builder → Publish.
How do I uninstall Agent Builder cleanly?
When you deactivate the plugin, a modal asks whether to also delete all data (off by default). Enable it to have all Agent Builder database tables, options, and conversation history removed cleanly when you delete the plugin. If you leave it off, database tables will remain after deletion. See the Uninstalling Agent Builder guide for full instructions.
Do I need a licence to use Agent Builder?
No licence is required for the free version, which is available on the WordPress plugin directory and includes all 8 bundled AI assistants. A Personal or Agency licence unlocks premium features including Channels (WhatsApp, Email, Slack), MCP integration, and the ability to install marketplace agents. See Pricing for licence options and feature comparison.
Will Agent Builder slow down my WordPress site?
Agent Builder’s impact on page load time is minimal. The chat widget is loaded asynchronously and does not block page rendering. On the admin side, the plugin adds a small overhead for pages that display agent dashboards, but has no impact on the WordPress admin pages for other plugins or on your site’s front-end page speed. See Performance and Scaling for optimisation tips on high-traffic sites.