Agentic → Deployment → Gutenberg Blocks lets you deploy any AI assistant as a native Gutenberg block. Once enabled, agents appear in the Block Inserter under the Agentic AI category and can be dropped into any post, page, or template — including the Full Site Editor.
Enabling Gutenberg Blocks
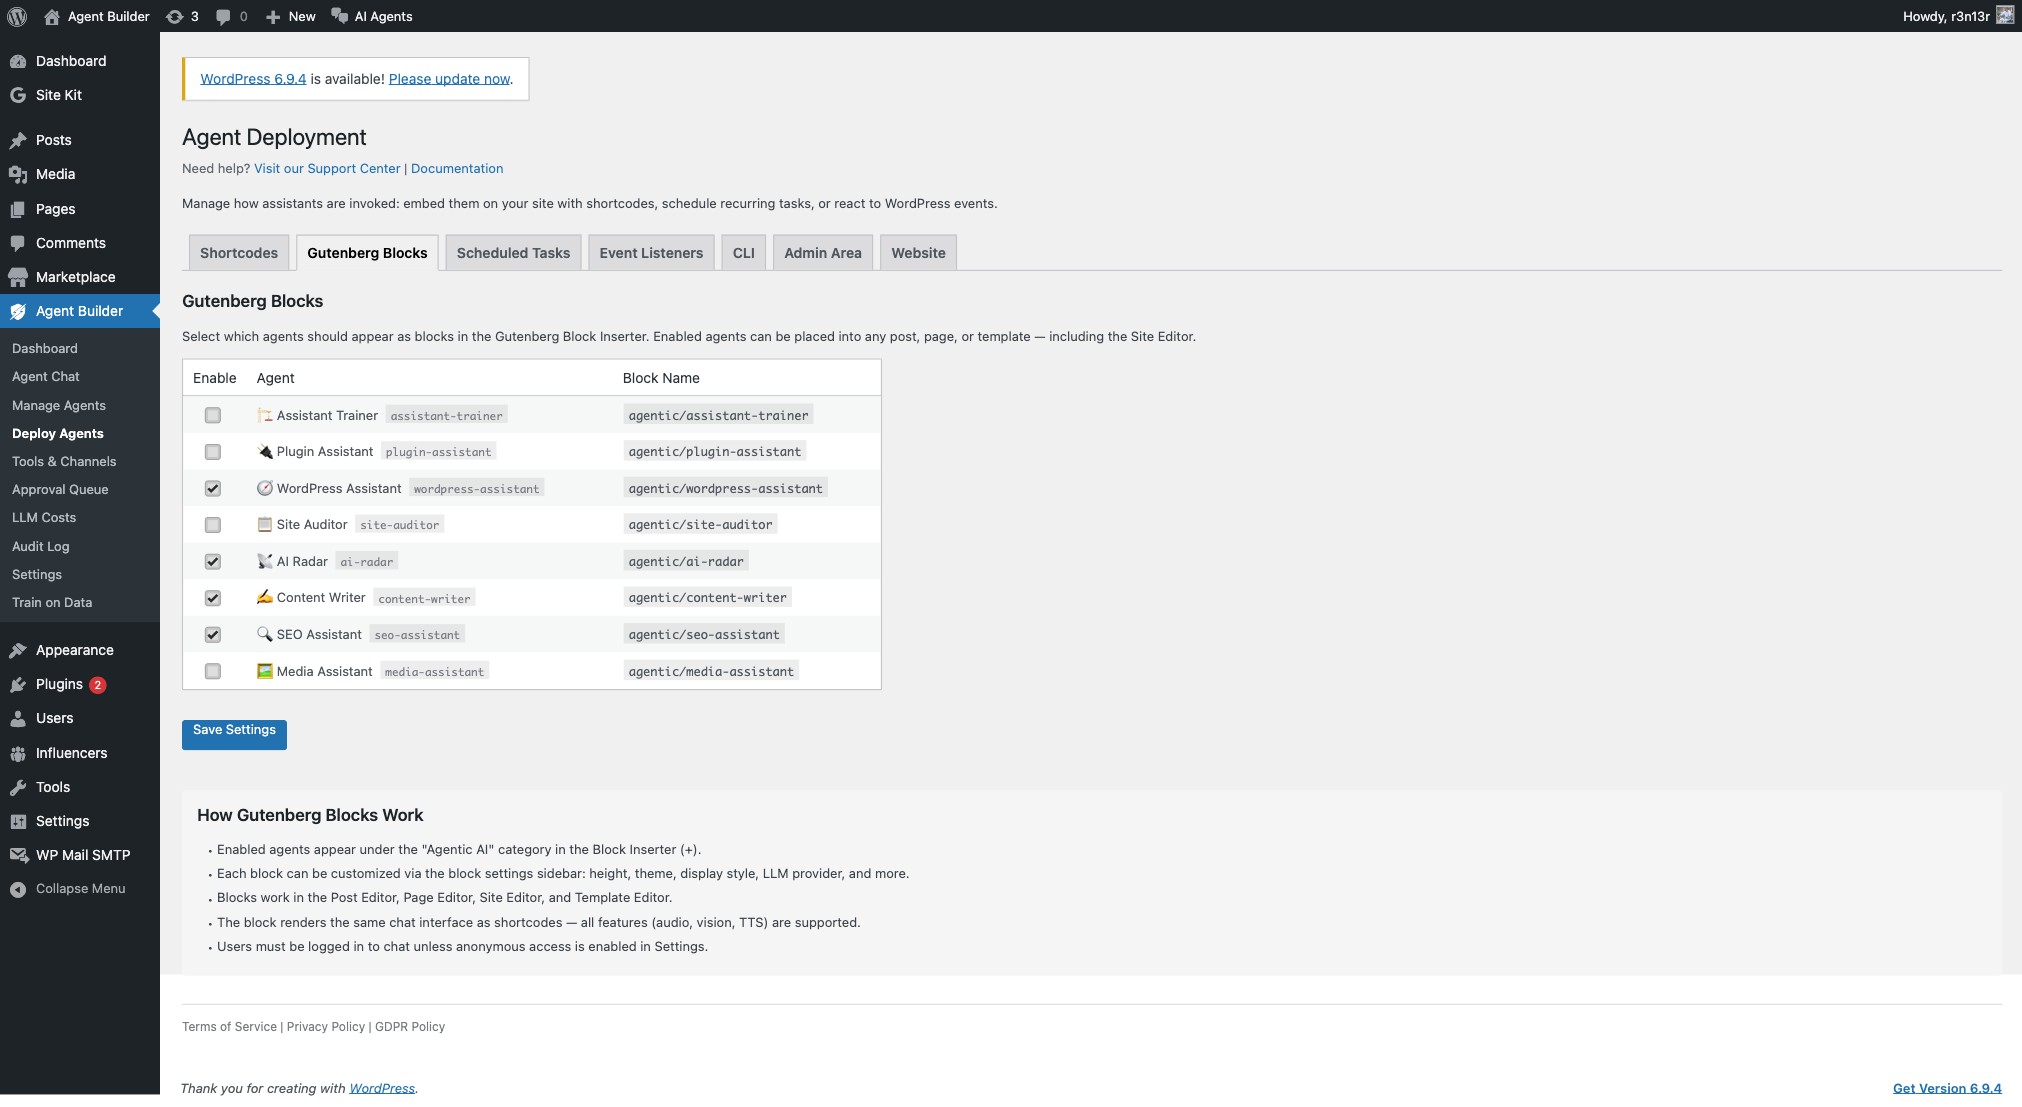
Navigate to Agentic → Deploy Agents and click the Gutenberg Blocks tab. You will see a table of all active agents with checkboxes. Tick the agents you want available as blocks, then click Save Settings.
Once saved, the selected agents immediately appear in the Block Inserter. Open any post or page, click the + inserter button, and search for the agent by name — or browse the Agentic AI category. You can also search using keywords like “chat”, “ai”, “bot”, or “assistant”.
Block Settings
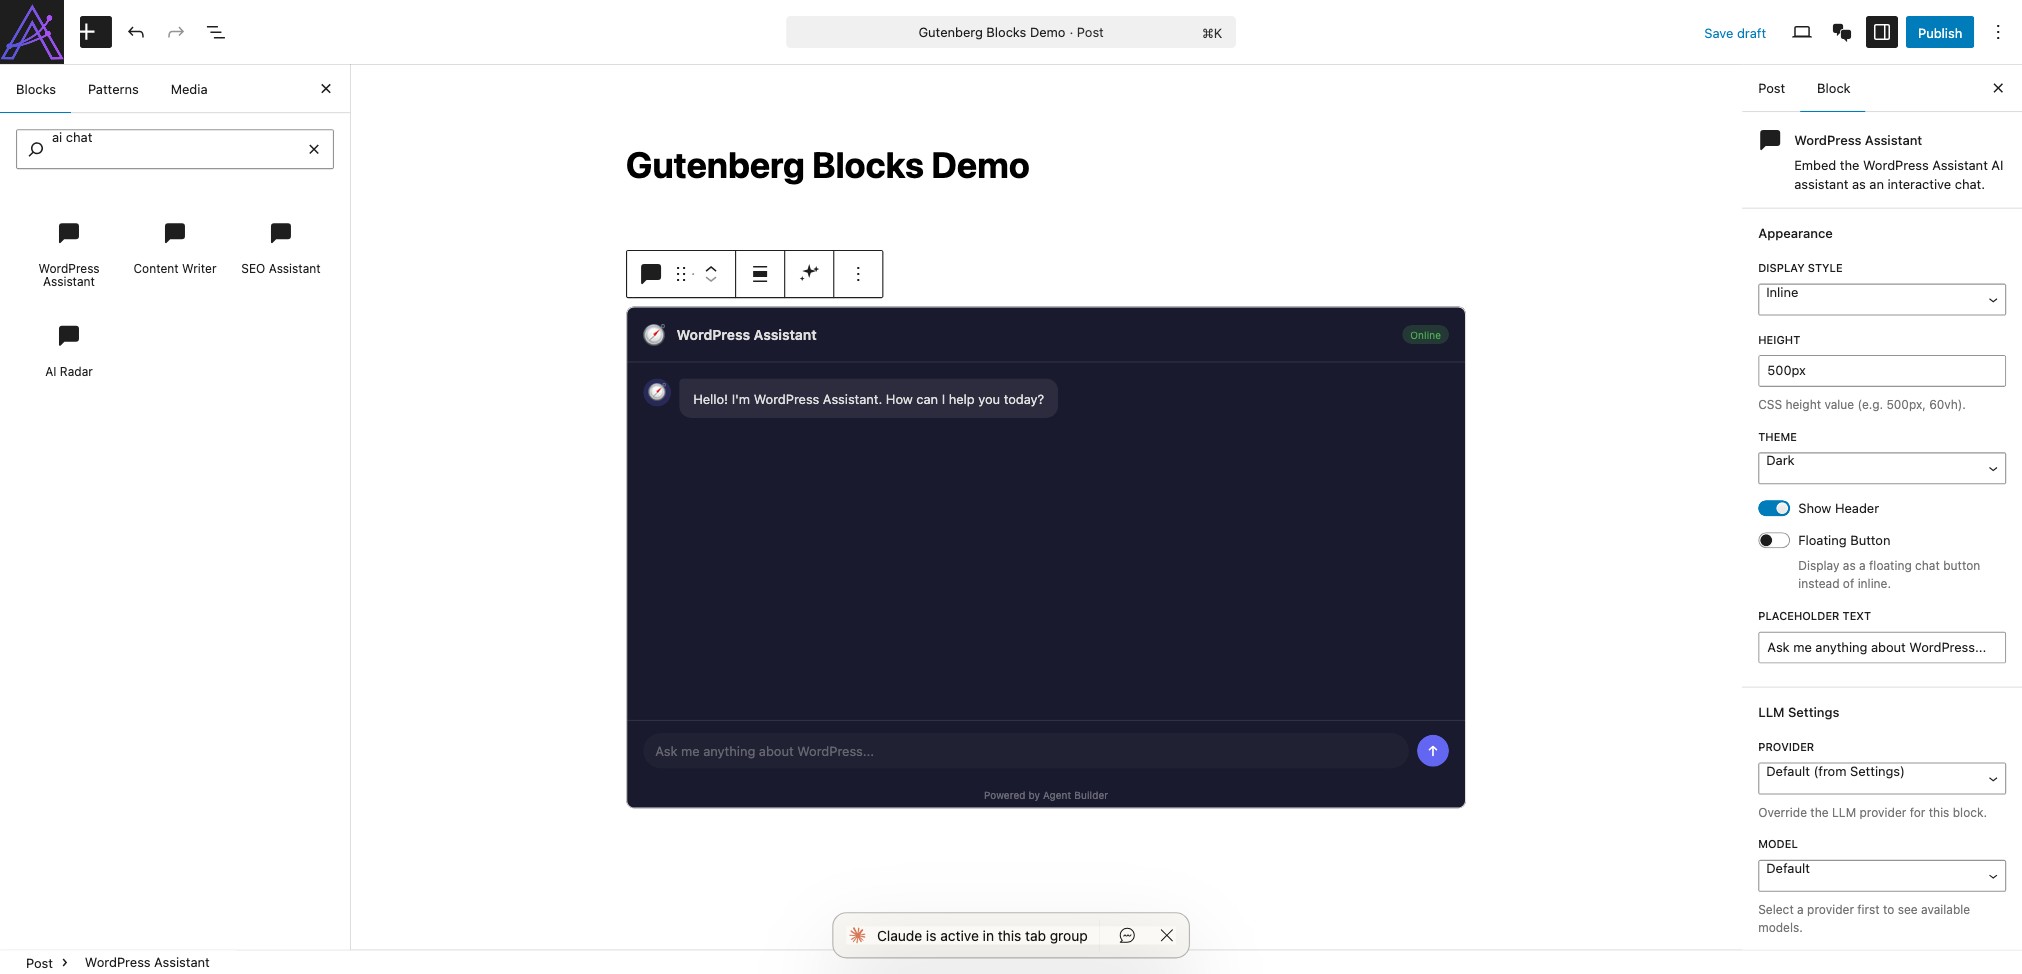
Each block provides controls in the block settings sidebar (right panel). These let you customise the chat widget without writing any code:
- Height — the CSS height of the chat widget (default:
500px). Use any valid CSS value like400px,60vh, or100%. - Theme — override the global chat theme for this block. Options: Default (from Settings), Dark, Light, Midnight, Ocean.
- Display Style — how the chat renders: Inline (embedded in the page flow), Popup (floating button that opens a chat overlay), or Sidebar (slides in from the edge of the screen).
- Floating Mode — when enabled, the chat floats in a fixed position over the page content.
- Placeholder Text — custom hint text shown in the empty message input field.
- LLM Provider — override the global provider for this specific block (e.g. use Claude for one block and GPT-4 for another).
- LLM Model — override the model used by this block.
Live Preview
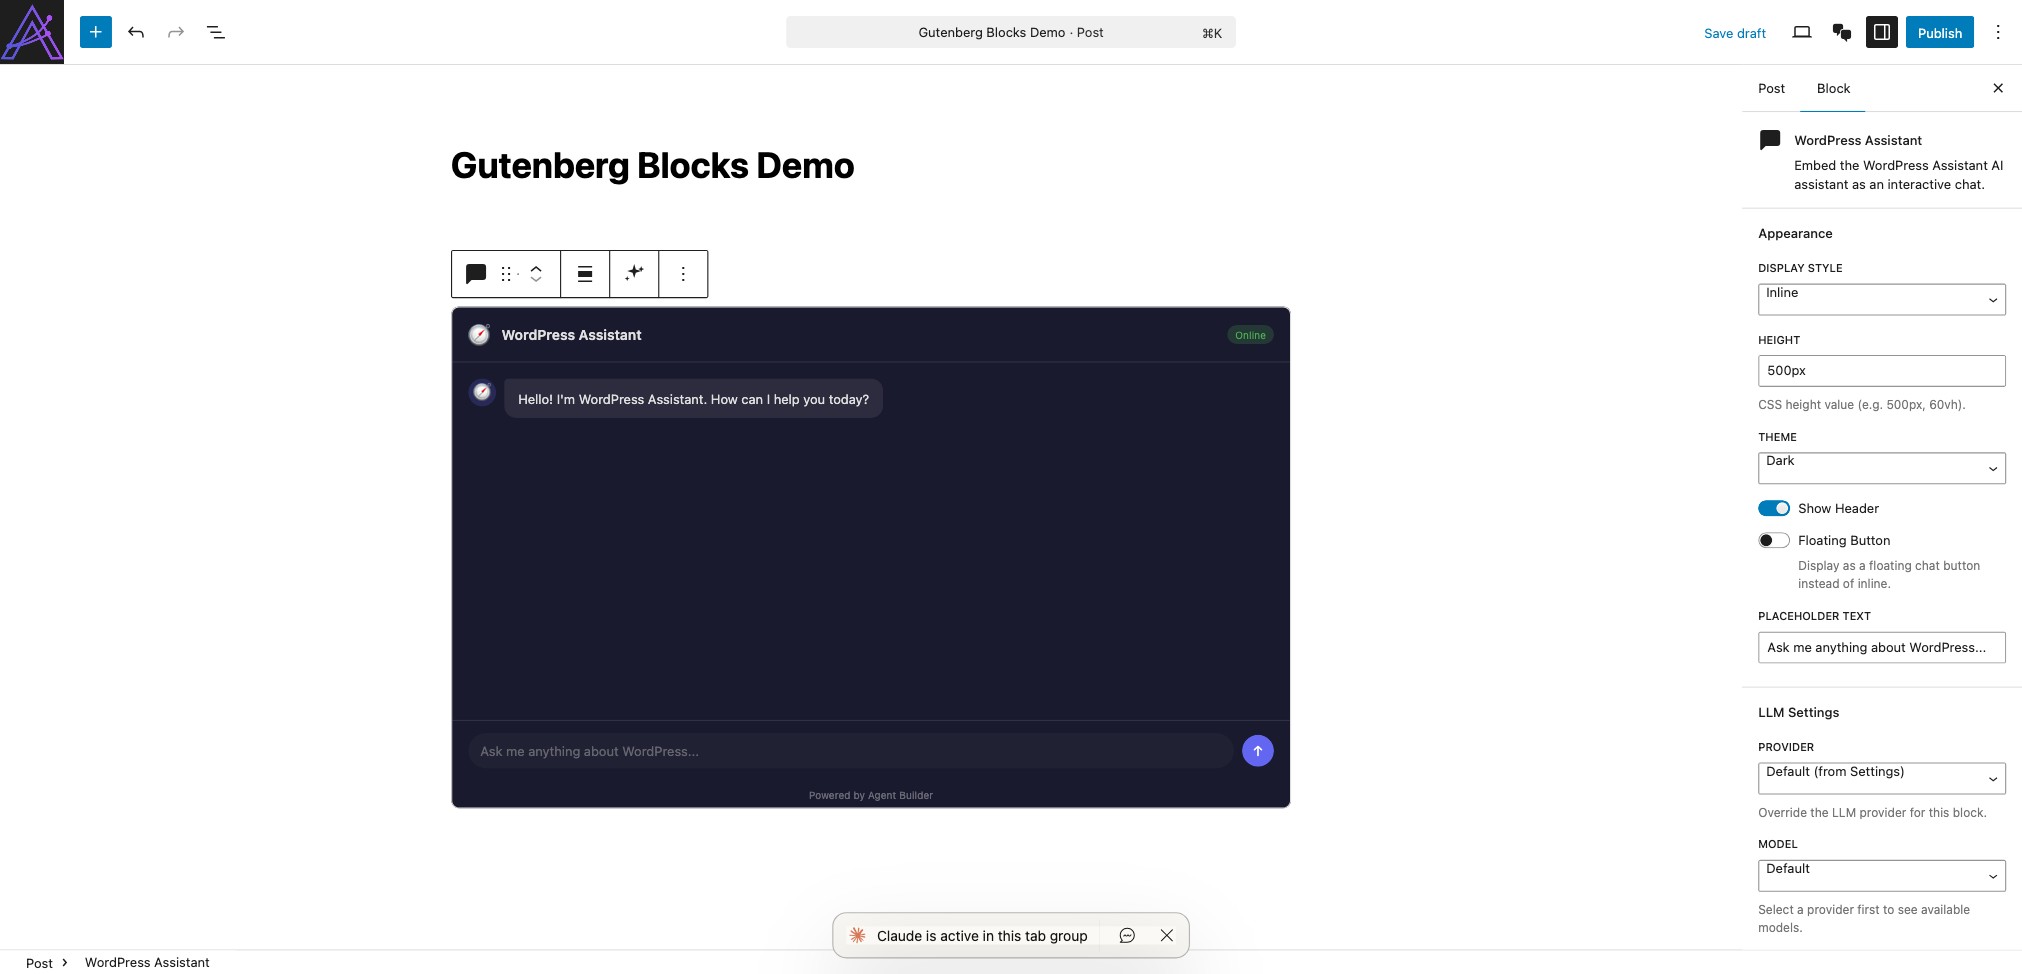
The editor displays a professional preview of the chat widget that updates reactively as you change settings. This lets you see exactly how the block will look before publishing — including the agent name, icon, theme, and placeholder text.
Where Blocks Work
Gutenberg blocks work everywhere the block editor is available:
- Post Editor — embed a chat in any blog post
- Page Editor — add a support agent to your contact page
- Site Editor — place a chat in your header, footer, or sidebar template
- Template Editor — add an agent to a custom template applied across multiple pages
- Widget Areas — use the block-based widget editor to add agents to widget areas
Blocks vs Shortcodes
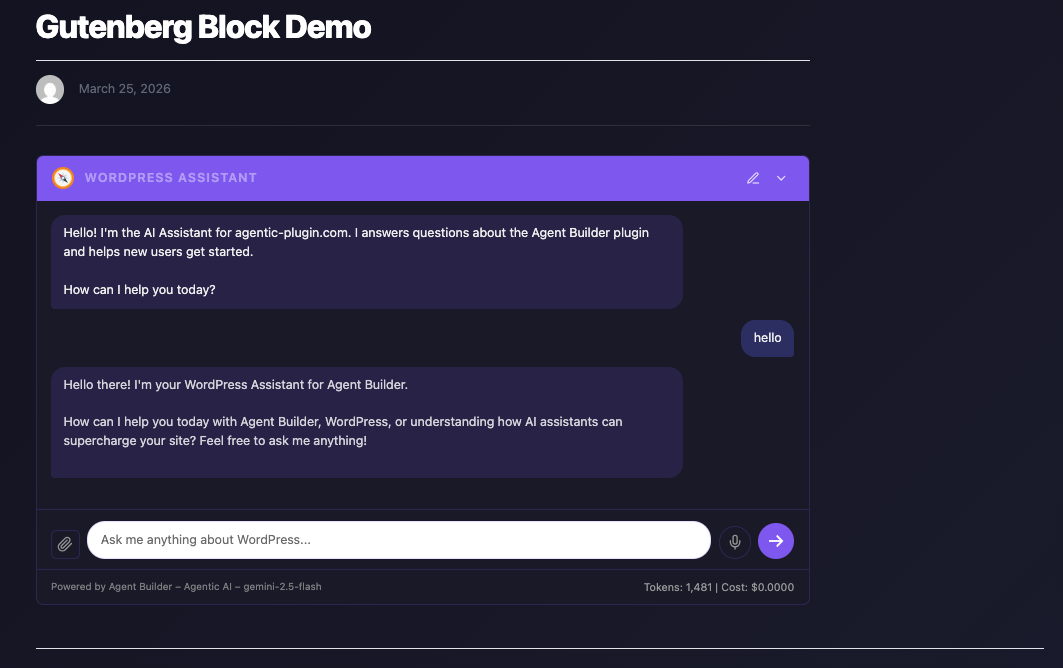
Blocks and shortcodes render the same chat interface and support all features (voice input, image upload, text-to-speech, vision). The difference is how you place them:
- Blocks — visual, drag-and-drop placement with a live preview and sidebar controls. Best for content editors and visual workflows.
- Shortcodes — text-based, works anywhere including Classic Editor, widgets, and PHP templates. Best for developers and programmatic use.
Notes
- Users must be logged in to chat unless anonymous access is enabled in Settings → Security.
- Disabling an agent in the Gutenberg Blocks tab removes its block from the inserter but does not affect existing pages — the block will show a placeholder message instead.
- The block name follows the pattern
agentic/agent-slug(e.g.agentic/content-writer).